Removing a sliding patio door is a simple process. First, lift the door and engage the adjustment screws to raise the rollers. Then, carefully tilt the door within its frame, allowing easy removal. Finally, lift the door out and place it aside for any necessary repairs or replacements.
Discover the secret to effortless patio door maintenance with our step-by-step guide on how to remove sliding patio doors. In this quick tutorial, we’ll walk you through the simple process, ensuring a hassle-free experience. Say goodbye to stubborn sliders follow our expert tips and enjoy smooth, seamless door removal.
To remove a sliding patio door, lift it up to release the bottom rollers. Unscrew the screws securing the door frame, and carefully lift the door out of the track. Be cautious, and ask for assistance if needed, to ensure a smooth and safe removal process.
Preparations
Preparations are essential before tackling any task. Begin by gathering all the necessary materials and tools required for the job. This ensures that you have everything at your fingertips, reducing interruptions and making the process smoother. Additionally, clear the workspace of any unnecessary items to create a safe and organized environment. This not only facilitates easy access to tools but also minimizes the risk of accidents or damage.
Furthermore, it’s crucial to double-check instructions or guidelines related to the task. Whether assembling furniture, cooking a recipe, or undertaking a DIY project, reviewing the steps beforehand helps prevent mistakes and ensures a more successful outcome. Taking the time to prepare adequately contributes to efficiency and enhances the overall experience of completing the task at hand.
How To Remove The Leaf Of A Patio Door
To remove the leaf of a patio door, start by locating the hinges. Use a screwdriver to unscrew the hinges from the door frame. Lift the door upward to detach it from the hinge pins. Carefully guide the door out of the frame for a successful removal.
Removing the Leaf of an Older Model
To remove the leaf of an older model, first, locate any securing mechanisms like screws or bolts. Use the appropriate tools, such as a screwdriver or wrench, to loosen and remove these fasteners. Once the leaf is detached, carefully lift it away from the main structure, ensuring a steady and controlled removal. Take your time and handle the leaf with care to avoid any damage during the process.
Removing the Leaf of a New Model
Removing the leaf of a New Model is a simple process. Identify the hinge attachment points on the door. Using a screwdriver, carefully loosen and remove the screws securing the hinges. Lift the door leaf upward to detach it from the hinge pins, ensuring a smooth and straightforward removal.
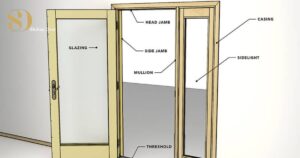
How To Remove The Door Frame
To remove it, first gently pry off any trim or molding around the frame using a flathead screwdriver or pry bar. Be careful not to damage or scratch the surrounding wall during this step. Locate and loosen any screws securing the frame to the wall, ensuring permanent release. After removing the screws, gently pull the frame away from the wall, checking for any additional fasteners that may need attention.
As you slowly pull the frame away from the wall, watch for any stubborn spots and use a flathead screwdriver or pry bar as needed. Thoroughly inspect the frame for any remaining screws or fasteners and remove them to ensure smooth extraction. This systematic procedure reduces the risk of damage to both the wall and the frame, making the removal process more efficient and effective.
Tools And Materials
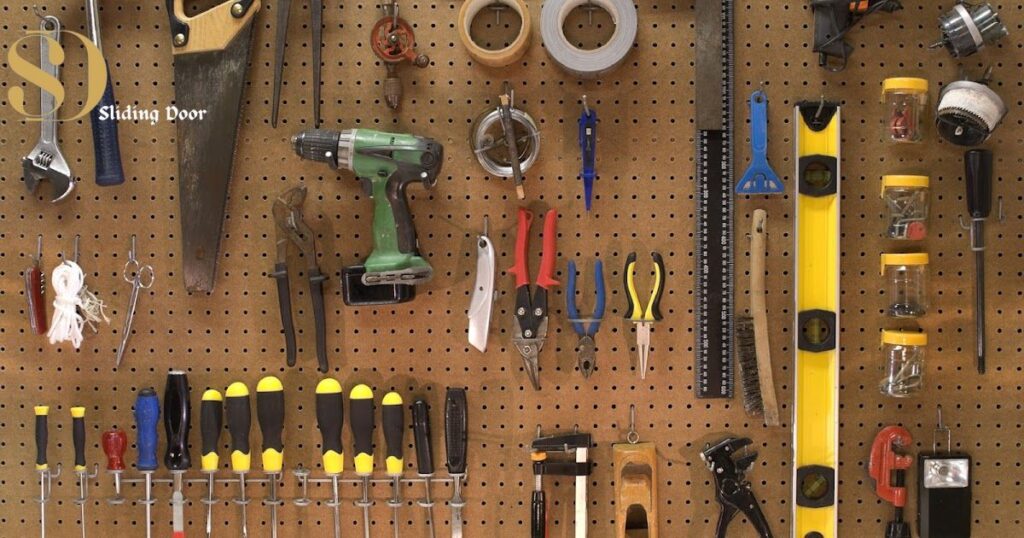
When undertaking a task, gather the necessary tools and materials beforehand. Common tools include screwdrivers, wrenches, and hammers, while materials may include screws, nails, or specific components for the task. Having everything prepared ensures a smoother and more efficient workflow. Double-check the requirements to avoid interruptions during the process.
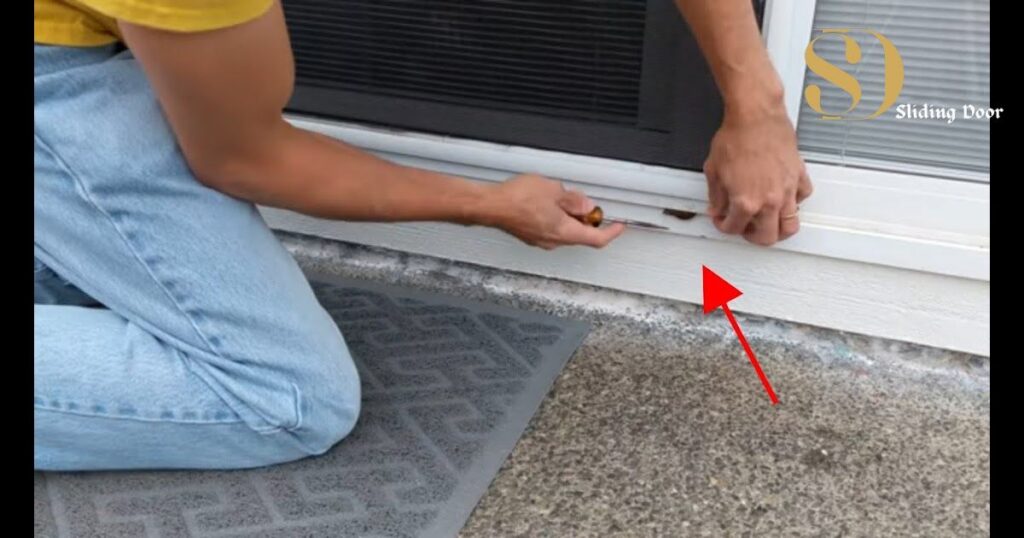
Flathead screwdriver/Putty Knife
Use a flathead screwdriver or a putty knife to carefully pry off any trim or molding around the door frame. Gently insert the tool between the trim and the wall, applying gradual pressure to loosen and remove the trim. Exercise caution to avoid causing damage to the wall or trim during this process.
Phillips Head Screwdriver
A Phillips head screwdriver is a tool with a cross-shaped tip, designed for turning screws with corresponding cross-shaped slots. It is commonly used for various household tasks, furniture assembly, and electronics. The tool provides a secure grip, facilitating the tightening or loosening of screws with Phillips head configurations.
Blankets or foam sheets
Blankets or foam sheets are useful for providing protection and padding during moving or storage. When transporting fragile items or furniture, wrap them in blankets or foam sheets to prevent scratches and reduce the risk of damage. These materials act as a cushion, ensuring that your belongings arrive at their destination in good condition.
Reciprocating saw
A reciprocating saw is a power tool with a blade that moves back and forth, enabling versatile cutting in multiple materials. Widely used in construction and demolition, it excels at tasks like cutting wood, metal, and plastic. Its design and functionality make it suitable for various applications where precision and adaptability are essential.
Caulk remover
A caulk remover is a tool or chemical solution used to soften and remove old caulking from surfaces. The tool may include a scraper or knife-like edge to help peel away the caulk, while chemical solutions work by breaking down the adhesive properties of the caulk. Caulk removers are handy in renovation and maintenance projects, aiding in the preparation of surfaces for recaulking or other applications.
Power drill
A power drill is an electric tool equipped with a rotating drill bit or screwdriver attachment, used for drilling holes or driving screws into diverse materials. Its versatility, adjustable speed settings, and compatibility with various attachments make it essential for a wide range of tasks, from basic repairs to intricate construction projects. The power drill is a cornerstone tool in woodworking, metalworking, and general do-it-yourself activities.
Pry bar/claw hammer
A pry bar, resembling a flat crowbar, is designed for leveraging and lifting materials in construction or demolition. A claw hammer, with a flat striking surface and a curved claw, is versatile for driving and extracting nails. These hand tools are essential in various tasks, offering efficiency in dismantling structures and separating materials during carpentry projects.
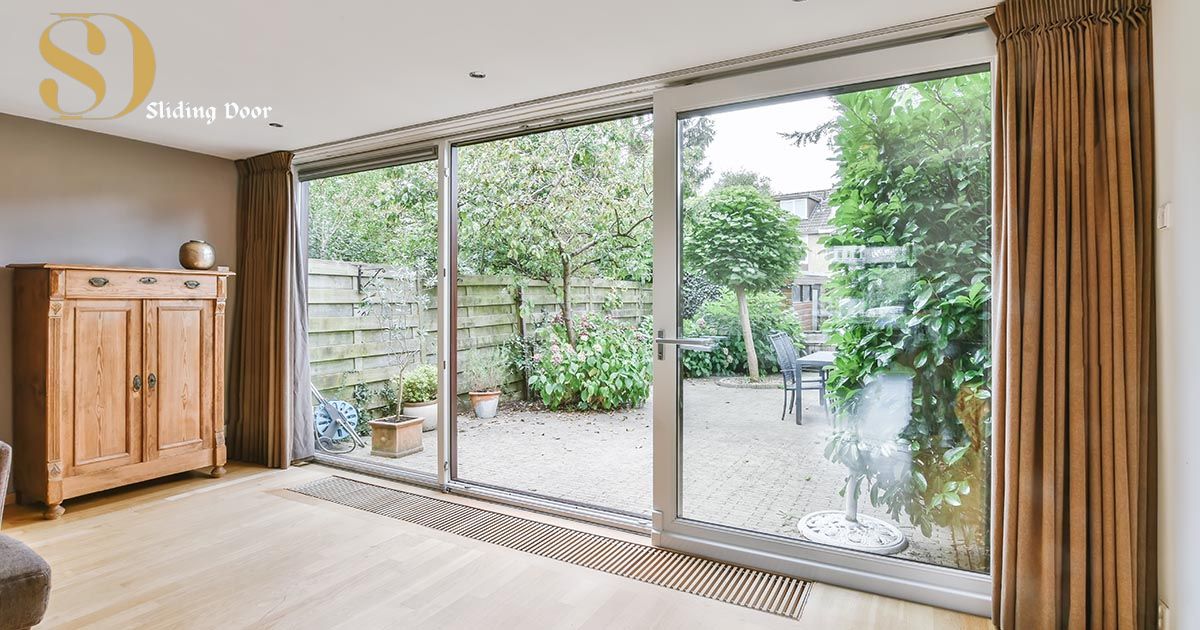
How To Remove A Sliding Patio Door From Its Track
To remove a sliding patio door, start by lifting it up slightly to release the bottom rollers from the track. Tilt the bottom of the door towards you, allowing the top part to clear the upper track. With a careful and steady motion, pull the door out of the track completely.
Check for any screws or bolts securing the door frame to the structure. Use a screwdriver or wrench to loosen and remove these fasteners. Once detached, lift the door out of the frame. Having a second person assist can make the process safer and more manageable, especially if the door is heavy.
Step 1: Prepare your workspace.
Before starting any task, ensure your workspace is organized and clear. Remove unnecessary items and create a clean and safe environment. This preparation helps facilitate a smooth workflow and minimizes the risk of accidents or interruptions during the task at hand.
Step 2: Adjust the adjustment screws
Locate the adjustment screws on the relevant equipment or object. Use the appropriate tool, such as a screwdriver or wrench, to make the necessary adjustments. Turning the screws clockwise or counterclockwise as needed allows you to fine-tune and optimize the settings. This step ensures proper functioning and alignment, contributing to the overall success of the task.
Step 3: Remove the head stop
Identify the head stop, usually located at the top of the equipment or structure. Utilize the appropriate tools, such as a screwdriver or wrench, to loosen and remove any screws or fasteners securing the head stop. Gently lift or slide the head stop away, allowing for easier access or adjustment as needed. This step is crucial for tasks requiring the removal or modification of the head stop for optimal functionality.
Step 4: Remove the sliding panel
To take out the sliding panel, carefully lift it from the bottom to disengage it from the track. Tilt the bottom of the panel towards you, ensuring the top clears the upper track. With a steady motion, guide the panel out of the track completely. Be cautious and, if necessary, seek assistance to handle the sliding panel safely, especially if it’s large or heavy. This step allows for maintenance, repairs, or replacement of the sliding panel as needed.
Step 5: Inspect the rollers
Examine the rollers at the bottom of the sliding panel. Check for any damage, wear, or debris that might affect their functionality. Clean or replace the rollers as necessary to ensure smooth operation. This step is essential for maintaining the efficiency and longevity of the sliding door mechanism.
Step 6: Remove the screen door
Step 6: Remove the screen door.
If your sliding patio door has a screen door, gently lift it from the bottom to disengage it from the track. Tilt the bottom of the screen door towards you to clear the upper track. With a careful motion, guide the screen door out of the track completely. Ensure you handle the screen door with care, especially if it’s delicate, and place it in a safe location. Removing the screen door allows for separate maintenance or replacement if needed.
Step 7: Remove the stationary door
To get it out, find a secure screw or bolt on the door frame. Using the appropriate tools, such as a screwdriver or wrench, loosen and remove these fasteners. Once detached, carefully lift the stationary door out of its frame. Be aware of the weight and size of the door, and consider hiring help to ensure a safe and controlled removal. This step allows for a complete inspection, repair or replacement of the stationary door as needed.
How to remove a sliding patio door frame
Preparations
Before starting, gather the necessary tools, including a screwdriver or wrench. Clear the surrounding area to ensure a safe and efficient workspace.
Roller Maintenance
Check the rollers at the bottom of the door for wear or damage. If needed, clean or replace them for smoother operation during the removal process.
Avoid Forcing the Door
When removing the door frame, avoid forcing the door at any point. If there’s resistance, double-check for any screws or fasteners that might still be securing the frame.
Things to Remember
Identify and remove any screws or bolts securing the frame to the structure.
Lift the frame carefully to avoid damage or injury.
Seek assistance if the door frame is heavy or if you encounter difficulties during the removal process.
Further Information:
For additional guidance or specific details related to your sliding patio door model, refer to the manufacturer’s instructions or seek professional advice. Taking a systematic and cautious approach ensures a successful and damage-free removal of the sliding patio door frame.
Frequently Asked Question
How do you take a sliding patio door off its track?
To take a sliding patio door off its track, lift the door to release the bottom rollers, tilt it to clear the upper track, and guide it out carefully.
Can the patio door be removed?
Yes, patio doors can be removed for maintenance, repairs, or replacement by following specific removal procedures.
Can a sliding glass door be removed?
Yes, a sliding glass door can be removed, typically by lifting it to release it from the bottom rollers and carefully guiding it out of the track.
How do you open a sliding patio door?
To open a sliding patio door, grasp the handle, and push or pull the door horizontally along its track. Ensure the door is free from any obstructions, and if there’s resistance, check for dirt or debris in the track that may need to be cleaned.
How do I remove a stationary sliding glass door?
To remove a stationary sliding glass door, loosen and remove screws or bolts securing it to the frame, then carefully lift the door out. Inspect for any damage and consider seeking assistance if the door is heavy.
Final Thought
Removing a sliding patio door is a manageable task that begins with lifting the door to release it from the track and, if applicable, unscrewing any securing elements. This straightforward process enables homeowners to carry out routine maintenance, make necessary repairs, or install a replacement door efficiently.
By following these simple steps, one can ensure a smooth removal process minimizing the risk of damage to the door or surrounding structures. Remembering to inspect and if needed replace components contributes to the overall functionality and longevity of the patio door.

For 8 years, I’ve been working with sliding doors. I know all the ins and outs, from how they’re designed to how they work. I’m here to share my expertise.